Connect Acumatica (Home Goods and Furnishings)
A step-by-step guide with pictures, from the Speakvora agent's own Connect tab.
Short answer: This connects your own Acumatica account to your Speakvora agent. Then a customer can text where is order 1234 and get the answer in seconds, and the agent can send status and tracking texts. The agent only reads. It can never create, change or delete anything in Acumatica. Only the status word and the order number.
Every key, number and name in the pictures is a made-up example. Nothing here asks you to share a real key with anyone but the app on your own computer.
This connects your own Acumatica account to your Speakvora agent. Then a customer can text *where is order 1234* and get the answer in seconds, and the agent can send status and tracking texts. The agent only reads. It can never create, change or delete anything in Acumatica. Only the status word and the order number are ever texted back, never names, prices, items or addresses.
TIP: You need about 15 minutes, a computer, and the sign-in for your Acumatica account (the owner or a manager). You can't break anything: if a step does not work, nothing has changed and you can just try again. The keys and screens below are made-up examples.
NOTE: This guide was written from Acumatica's public developer documentation (a few details could not be confirmed) and has not been tried yet on a live Acumatica account. If a screen looks different from what is described, press Connect, then Download report, and send it to support. We fix it for everyone.
Who this is for: furniture home goods. How Acumatica gives access: The vendor connects through an authorised app. Follow the steps below to create or authorise it in your own account. What it costs you: Acumatica does not state a separate API fee in the pages read; API use is subject to your license request limits.
Part 1. Get your key from Acumatica
Do this on your computer, in a new browser tab, signed in to Acumatica.
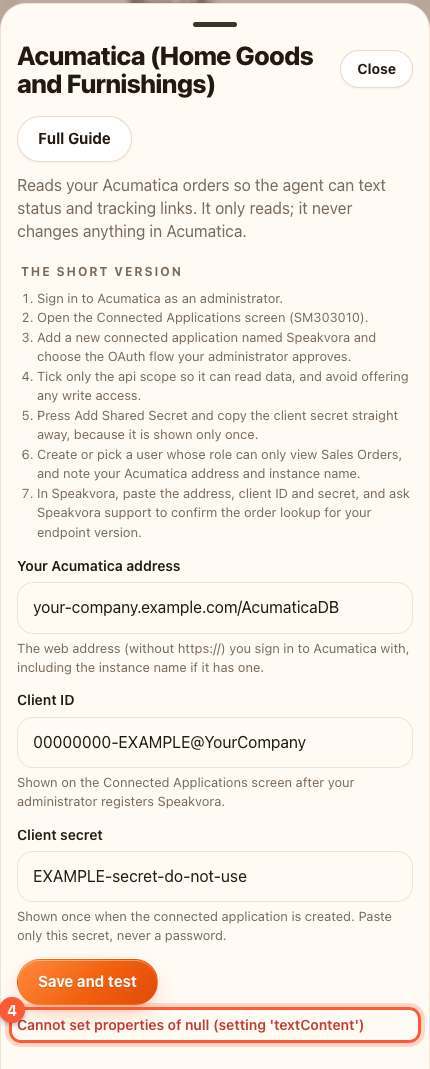
- Sign in to Acumatica as an administrator.
- Open the Connected Applications screen (SM303010).
- Add a new connected application named Speakvora and choose the OAuth flow your administrator approves.
- Tick only the api scope so it can read data, and avoid offering any write access.
- Press Add Shared Secret and copy the client secret straight away, because it is shown only once.
- Create or pick a user whose role can only view Sales Orders, and note your Acumatica address and instance name.
- In Speakvora, paste the address, client ID and secret, and ask Speakvora support to confirm the order lookup for your endpoint version.
WARNING: If Acumatica asks which permissions to give, tick only the read-only ones: Connected application scope: api (REST API access), Acumatica user rights: view Sales Orders (SO301000) only. Never give write or admin access.
TIP: To copy the key, click inside the box that shows it, press Command + C on a Mac or Ctrl + C on Windows (or right-click and choose Copy). Nothing will look different. It is now in your clipboard, ready to paste. Keep it private: anyone who has it can read your orders.
Part 2. Open the Connect tab in your agent
- Open your agent's dashboard (the page you open from the Start Speakvora Agent file).
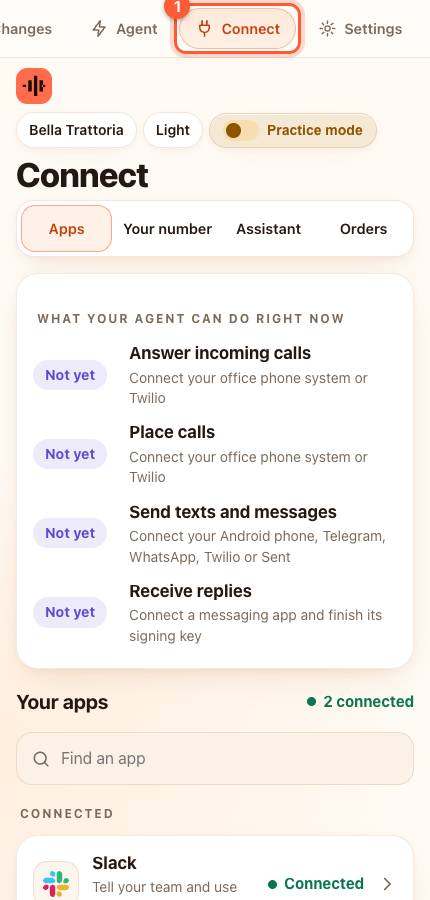
- Press Connect in the menu. On a phone the menu is the bar along the top; slide it sideways if you do not see Connect.
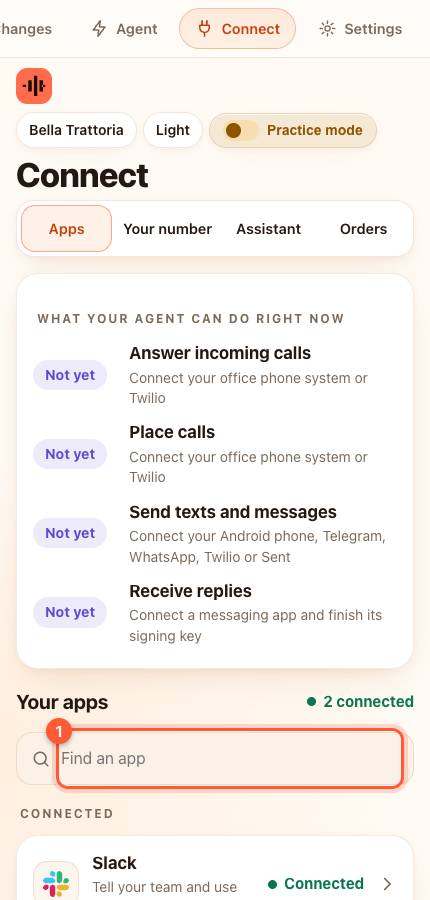
- Under Your apps type Acumatica in the box that says Find an app (1), or scroll down the list.
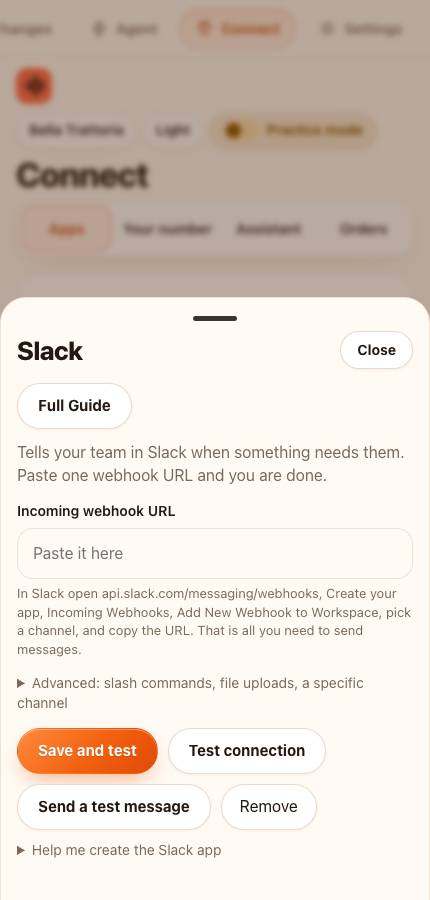
- Press Acumatica (Home Goods and Furnishings). A card slides up. (If you only see apps for your own kind of business, that is on purpose: your agent only shows the systems that make sense for it.)
Part 3. Paste it in
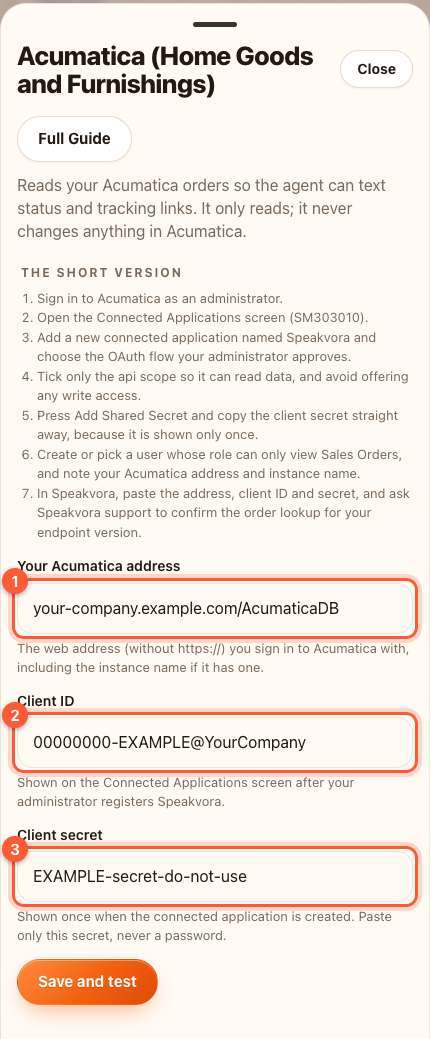
3 boxes to fill in. Click inside a box, press Command + V on a Mac or Ctrl + V on Windows, then move to the next:
- Your Acumatica address. The web address (without https://) you sign in to Acumatica with, including the instance name if it has one.
- Client ID. Shown on the Connected Applications screen after your administrator registers Speakvora.
- Client secret (secret: it stays on this computer and is never shown again, only the last few characters). Shown once when the connected application is created. Paste only this secret, never a password.
TIP: Pasted by mistake into the wrong box? Click the box, press Command + A (Ctrl + A on Windows) to select all, then paste again.
Part 4. Test it
- Press the orange Save and test button.
- Acumatica has no safe read-only check we can run, so nothing is called. The connection is used for real the first time a customer asks about an order, and any problem shows in Activity.
YOU SHOULD SEE: green words starting with Connected. (here: *Saved* and the sentence about the first customer)
WARNING: Red words mean it did not work yet. Read them, then see If something is wrong below. Nothing bad happened.
What happens next
- A customer texts something like where is order 1234. The agent answers *Your order 1234 is preparing.* (the status word from Acumatica), or *I could not find that order. A team member will check and reply.*
- Each person can ask five times an hour. If Acumatica is down, the conversation carries on and the problem is written to Activity.
- Mode: the agent asks Acumatica when a customer asks.
If something is wrong
- It says the key was refused (401 or 403): copy the key again from Acumatica. Make sure there is no space before or after it, and that it is a live key for the right shop or location.
- It cannot find an order (404): the number is not in Acumatica, or Acumatica uses a longer number than the one on the receipt.
- It says too many requests (429): wait a minute and press Save and test again.
- Acumatica says you need a plan or approval: Acumatica has no customer-created permanent API key. Each customer registers an OAuth 2.0 connected application inside their own instance, and the access token comes from an OAuth flow. The documented order lookup is GET /entity/Default/{version}/SalesOrder/SO/{number} with an Authorization: Bearer token, and the endpoint version depends on your instance. The token exchange and the status field name were not confirmed in the pages read, so no test or order call is set until it is verified against a live instance.
- Still stuck? Press Connect, then Download report, and email it to support. It never contains keys or customer messages.
If your plan has no API
- Ask your Acumatica partner or administrator to register a read-only connected application for Speakvora.
- Without API access, tell callers to contact your sales desk for order status.
Acumatica's own instructions: https://help.myob.com.au/advanced/Docs/Published/IntegrationDevelopmentGuide/IS__con_CB_API.html
All help guides · Every agent feature · AI receptionist by industry
Questions
What if this happens: It says the key was refused (401 or 403)?
copy the key again from Acumatica. Make sure there is no space before or after it, and that it is a live key for the right shop or location.
What if this happens: It cannot find an order (404)?
the number is not in Acumatica, or Acumatica uses a longer number than the one on the receipt.
What if this happens: It says too many requests (429)?
wait a minute and press Save and test again.
What if this happens: Acumatica says you need a plan or approval?
Acumatica has no customer-created permanent API key. Each customer registers an OAuth 2.0 connected application inside their own instance, and the access token comes from an OAuth flow. The documented order lookup is GET /entity/Default/{version}/SalesOrder/SO/{number} with an Authorization: Bearer token, and the endpoint version depends on your instance. The token exchange and the status field name were not confirmed in the pages read, so no test or order call is set until it is verified against a live instance.
What if this happens: Still stuck??
Press Connect, then Download report, and email it to support. It never contains keys or customer messages.